You do not need a studio to make a useful drum recording. A good room, sensible microphone placement, and a short test take matter more than a complicated setup. Start with the gear you have, then add microphones only when you know what the recording is missing.
Choose the Quietest Room, Not the Biggest One
Drums are loud, and a microphone will capture the room along with the kit. Before setting up, play a few hits and listen for a long, harsh echo. Bare walls, windows, and hard floors can make cymbals sound sharp and distant. A smaller room with rugs, curtains, and furniture may give you a more controlled recording.
Move the kit away from corners if you can. Corners can exaggerate low frequencies, making the kick and toms sound muddy. Put a rug under the kit to reduce movement and floor reflections. Heavy curtains or a thick blanket hung safely away from lights and electrical gear can help tame a bright wall. You do not need to cover every surface; a room that sounds completely dull can make drums feel lifeless.
Turn off noisy fans and check for traffic, appliances, or rattling objects before each take. If you share your home, agree on a recording time and protect your hearing during long sessions. Many ideas from a small-budget home office setup, such as controlling background noise and keeping cables tidy, also help here.
Start With One Microphone
One microphone is a good starting point because it forces you to listen to the whole kit. Place it several feet in front of the drums, roughly at the drummer’s chest height, and point it toward the center of the kit. Record a short passage, then move the microphone rather than reaching for an equalizer. Moving it closer often gives you a stronger direct sound; moving it farther away brings in more of the room.
If the cymbals dominate, try a lower position or aim the microphone slightly away from them. If the kick disappears, try a spot closer to the front of the kit. Keep the stand stable and outside the path of sticks and pedals. Avoid placing the microphone so close to a drum that every hit overloads it.
A single mic cannot give you separate control over the snare, kick, and cymbals later. It can still produce a balanced recording for practice videos, demos, or song ideas. The important test is whether the full kit sounds good when you play your normal grooves, not just when you hit each drum alone.
Use Your Phone for a First Take
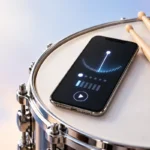
A phone is enough to find out how your room and playing sound. Put it on a stable stand rather than on a vibrating table or directly beside the kit. Start a few feet away, with the phone’s microphone unobstructed, and record your loudest section first. Listen back for crackling, harsh cymbals, or a kick that swallows everything else.
Many phone recording apps adjust volume automatically. That can make quiet parts rise and loud hits sound squeezed. If your app offers manual recording levels, set them so hard hits do not distort. If it does not, increase the distance between the phone and the drums and try again. An external microphone may help, but check that it works with your phone, connector, and recording app before relying on it.
Switch on airplane mode if you do not need a connection, silence notifications, and check available storage before a long take. For Android users short on space, this guide to freeing up phone storage can help prevent an avoidable interruption. Save each promising take with a clear name so it is easy to find later.
Add Microphones Only When You Need Control
If one microphone captures a pleasing kit sound but the kick is too weak, a second microphone near the kick may be enough. A simple two-mic setup can also use one microphone above the kit and one in front of the kick. With more inputs, a common next step is two overhead microphones plus close microphones for the kick and snare. Overheads should capture a balanced picture of the whole kit, not just the cymbals.
Multi-mic recording needs an audio interface or recorder with enough separate inputs for the microphones you plan to use. Confirm the connector types, input count, and whether any condenser microphones need phantom power. A USB-C socket alone does not tell you what a cable or device supports; the USB-C cables and speeds guide explains why specifications matter.
More microphones also create more chances for the same hit to arrive at slightly different times. That can make drums sound thin when tracks play together. Listen to all microphones at once, move them if the sound loses weight, and keep the setup simple enough that you can repeat it.
Set Levels and Listen Before the Full Take
Play the loudest part of the song while setting recording levels. On an interface or recorder, lower the input gain until the loud hits stay below the clipping point. A quiet-looking waveform is easier to work with than a distorted recording. Do not judge levels from a few gentle taps; drummers often play harder once a full take begins.
Use headphones to check for rattles, hum, and unwanted room noise. Closed-back headphones are useful when you need to hear a backing track without sending much of it back into the microphones. Keep the listening volume reasonable: drums in the room are already loud, and turning up headphones to compete with them can make a session tiring. If you are deciding what listening gear suits other everyday uses too, the earbuds versus headphones guide covers the basic trade-offs.
Record 20 to 30 seconds, then stop and listen through the entire sample. Check the loudest hits, quietest notes, and any count-in or backing track. Fix microphone placement, noise, or clipping now. Those problems are much harder to repair after a complete performance.
Keep Editing Simple and Save Your Takes
A clean performance is the best time-saver. Before recording, tighten rattling hardware, check the drum tuning, and make sure the drummer can hear the song or count-in clearly. Afterward, listen to the full take before changing the sound. Note where a fill rushes, a cymbal masks the snare, or background noise appears.
Start editing with basic tasks: trim unwanted silence, choose the strongest take, and make modest level changes. If the recording sounds muddy, first ask whether the microphone was too close to a wall or whether the kick dominated the room. If cymbals sound harsh, heavy processing may be less effective than moving the microphone and recording again.
When combining several microphone tracks, avoid shifting them blindly. Small timing differences are part of how microphones capture a kit, and careless changes can make the sound worse. Compare any edit against the original at a similar listening volume. Keep an untouched copy of each take and save the project to a second location when possible. Clear file names, such as a song name and take number, make it much easier to return to a good performance.
Practical Setup Comparison: Pick Your Starting Point
The simplest setup is the one you can place, check, and use consistently. Choose based on what you need to hear separately, not on how many microphones a studio might use.
- Phone only: Best for practice, quick demos, and checking your playing. Use a stand, record a loud test, and move the phone if the sound distorts.
- One microphone: Best for learning placement and capturing a natural whole-kit sound. Spend time finding a balanced position in the room.
- Two microphones: Useful when the one-mic sound is good but the kick needs more presence. Check that both microphones sound full when played together.
- Several microphones: Useful when you need separate control over drums for a larger music project. Expect more cables, setup time, and placement checks.
If acoustic drums are too loud for your home, an electronic kit may be a more practical way to record at a comfortable household volume. Its output and recording options vary by kit, so check the manual; this guide to how an electronic drum set works explains the basics. Whichever route you choose, make a short test recording before committing to a full session.
Frequently Asked Questions
Can I record drums at home with just a phone?
Yes. Put the phone on a stable stand several feet from the kit, record your loudest playing, and move it if the audio distorts.
Where should I put one microphone for a full drum kit?
Start several feet in front of the kit at about chest height, aimed toward its center. Move it and compare short recordings until the kick, snare, and cymbals sound balanced.
Do I need soundproofing to record drums?
You can improve a recording with rugs, curtains, and careful room choice, but those do not soundproof a room. Drums may still be loud outside it, so plan around other people nearby.
Why do my drums sound thin with multiple microphones?
The microphones may be capturing the same hits at different times. Listen to them together and adjust placement before trying to fix the tracks in editing.
Final Thoughts
Start with a quiet room and the simplest recorder you have. Make a loud test take, listen carefully, and change one thing at a time. A phone or one well-placed microphone can teach you what your drums need before you invest time in a larger setup.